In this topic, you will find a list of common troubleshooting errors and their possible causes and solutions.
Virtual Computer (DCV) Freezes
Cause:
The Virtual Computer does not work since the display drivers are not updated.
Solution:
- Update the Display adapter’s drivers.
- Go to Control Panel > Device Manager.
- Expand Display adapters.
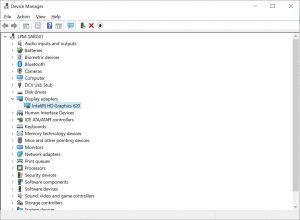
- Right click on Intel(R) UHD Graphics > Update driver.
- Click Search automatically for drivers.
- Update the latest drivers.
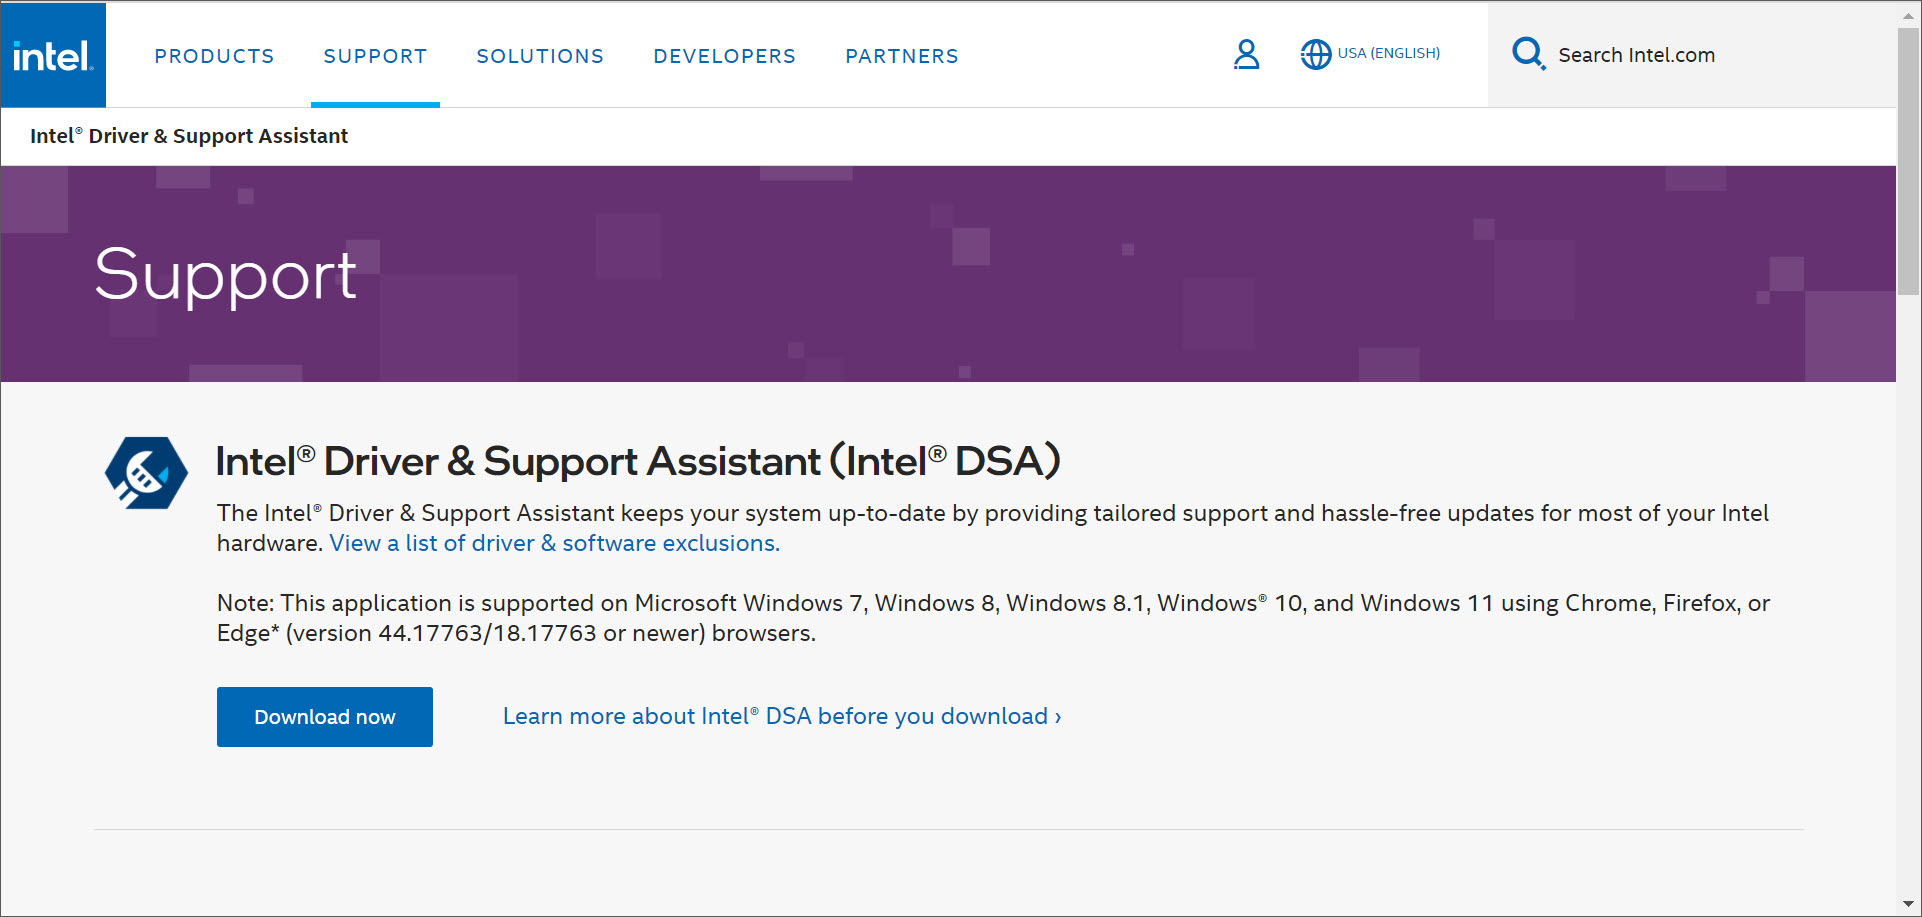
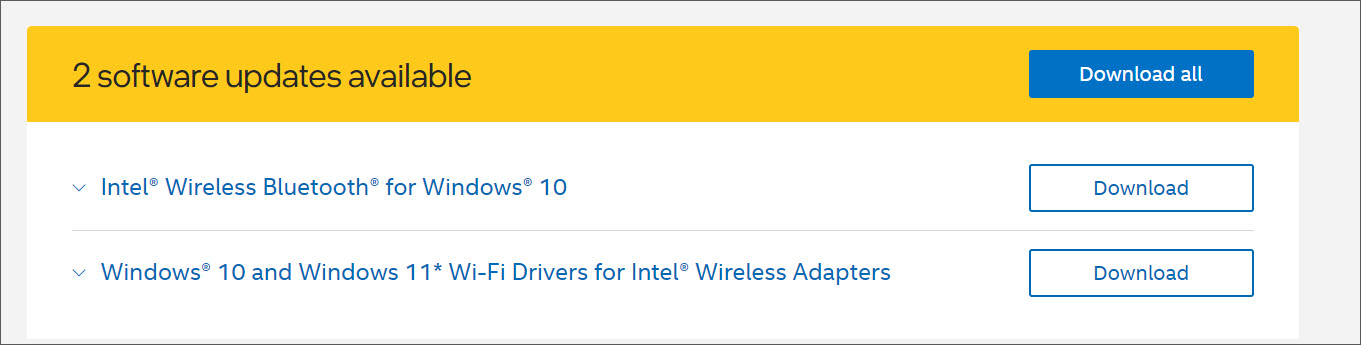
- If the latest drivers are not detected, then install the latest Intel Driver & Support Assistant (Intel DSA). This support assistant will detect the required updates and allow them to be installed.
- Click Download now.

- Double click Intel-Driver-and-Support-Assistant-Installer.exe.
- Click the I agree to the license terms and conditions box, and then Install.

After successful installation, the support assistant will detect the required update, if any.
- Download and install the updates that were detected.

Connectivity Issue in the Virtual Machine
When you log into the Virtual Computer, you might encounter connectivity issues and your computer fails to connect to the network.
Solution:
- Check the Internet Connection
- Command Prompt.
- Enter ping ssp.elcom.digital -t as the command to check if the connectivity is established.
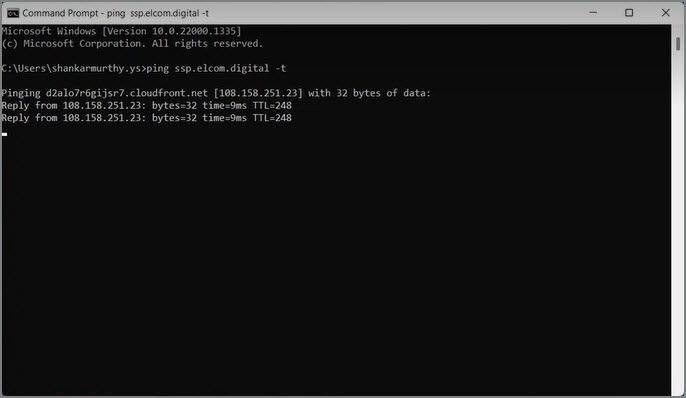
- Check connectivity with the Server
If there is any Internet connectivity issue, you will get consistent request timeouts.
- Change your internet connection and try again.
- Contact your network service provider to fix .
At times, even though the Internet connection is working as expected, your virtual computer may not be connected to the server. In such situations,
- Check if there are any network service issues.
Note: A network service lookup (nslookup) can be performed by providing the DNS address.
- Open the Command Prompt.
- Enter nslookup pod001.elcom. digital as the command to check the connectivity.
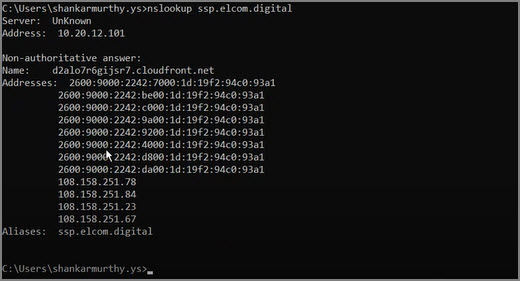
This will check to which DCV server is the communication reaching. In case there are timeout issues in the network server, it might mean that the firewall or router you are using has restrictions for certain URLs necessary to establish the connection.
Note: Firewalls/routers help in avoiding unauthorised access to the Virtual Office, unless any URL is added to the firewall’s/router’s exception list.
- Add the following URLs to the Firewall/Router exception list to establish a stable connection.
Note: Firewalls/routers help in avoiding unauthorised access to the Virtual Office, unless any URL is added to the firewall’s/router’s exception list.
- elcom.digital
- auth.elcom.digital
- ssp.elcom.digital
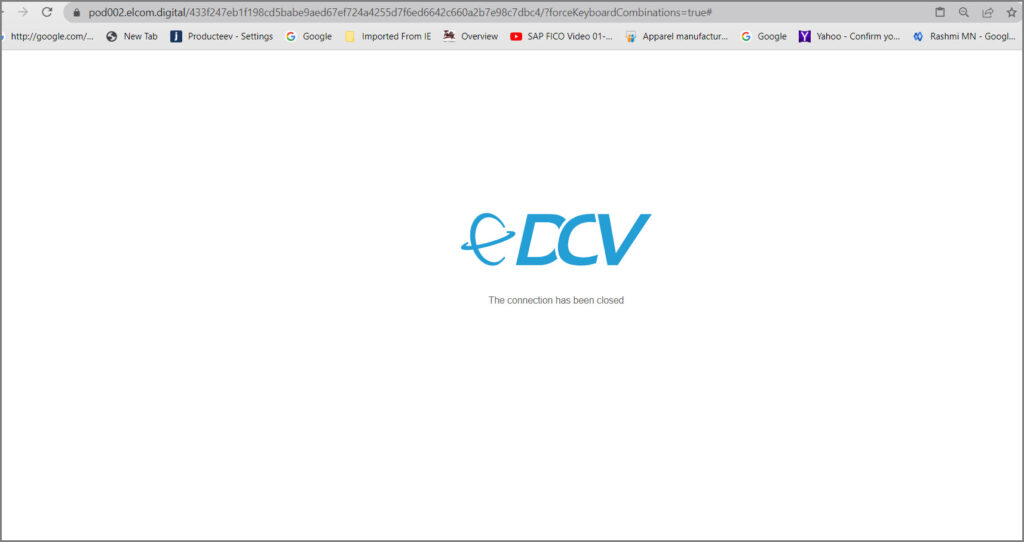
Request Timed Out
While logging into your Virtual Computer, you could face consistent request timed out and intermittent internet disconnection due to connectivity issues. The Command Prompt appears, as shown below:

To troubleshoot this issue, you could:
- Contact your internet service provider to resolve the connectivity issue.
- Check who your internet service provider is and get information about your IP address by simply looking it up on google.
Virtual Office/Machine Status Appears as Error
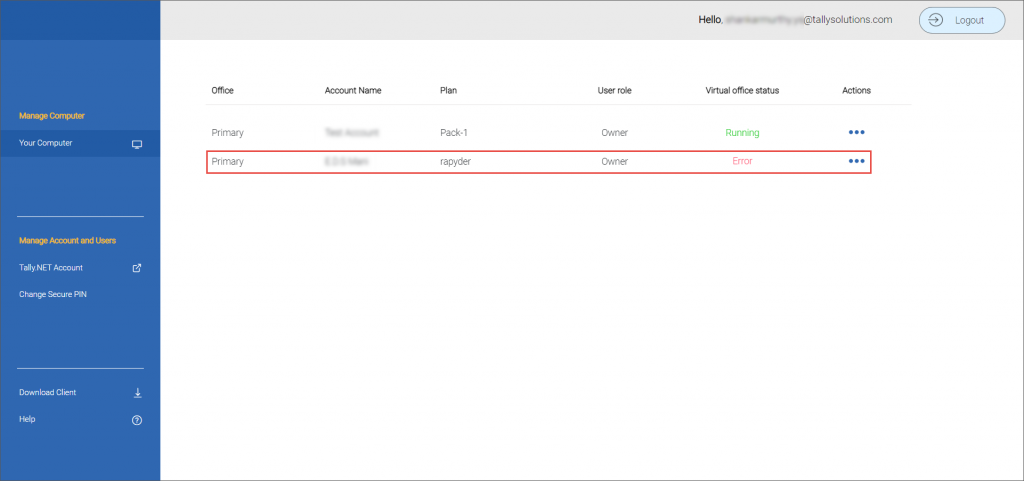
This error occurs, if:
- There is no available CPU/Memory, and the user tries to connect to the Virtual Computer.
- The number of users added exceeds the allocated user pack.
Solution:
- Log in to the Computer & User Management portal using your Tally.NET ID, Tally.NET Password, and Secure PIN.
- Click Restart under the Action column.
- Select Restart Virtual Office.
- In case the issue persists, change the status of the excess user to inactive.
- Click Manage Users under the Action column.
- Under Action, click the ellipsis sign (…) against the account name and select Edit.
- Change the User Status to Inactive.
- Click Save.
Printing
Local printers are not listed during Printing in TallyPrime
Cause:
The issue occurs when Windows updates are not installed, which prevents the printer list from appearing.
Solution:
- Download the Microsoft updates based on your operating system.
- Ensure that the Microsoft updates are installed successfully.
E-mailing
Provision e-mail for creating an account not received
Cause:
- E-mail might have been received in your Spam/Junk/Promotions folder instead of in your Inbox.
- Invalid/wrong email ID.
- Problem with specific email servers (such as Yahoo, Gmail, Outlook, and so on).
Solution:
- Ensure that the correct email address is shared during the provisioning of the Virtual Machine.
- In the case of a Gmail account, check the Spam/Junk/Promotions folders.
- Search with the keyword no-reply@elcom.digital.
Unable to send emails using my Gmail account
Cause:
Gmail uses less secure applications to send emails from TallyPrime.
Solution:
To fix the problem of sending emails from TallyPrime through your Gmail account, you can follow the troubleshooting methods outlined below:
- Login to your Gmail account.
- Click Account from Google apps.
- Select Security under Google Account settings.
- Choose from the following options:
- Method 1: Enable Less secure app access
- Turn off 2-Step Verification displayed under Signing in to Google.
- Turn on access for Less secure app access > turn on Allow less secure apps.
Enabling Less secure apps access sometimes works when using for some email addresses, but it does not work for all Gmail addresses. When this is the case, it is recommended to use app-based passwords for specific applications, as explained in Method 2.
- Method 2: Generate App passwords
- Turn on 2-Step Verification by completing the process of verifying the password and the verification code.
Now you can find the App passwords option under Singing in to Google.
- Generate App passwords.
- Click App passwords > enter your password > click Next.
- Click Select app and choose Other (Custom name).
- Type TallyPrime in the space provided.
- Click GENERATE to create a password.
You will see the app password for your device on the screen.
- Note down the password and click DONE.
After you enable Method 1 and try to send emails from the Virtual Computer, and if that fails, you can enable Method 2 to send emails. You can choose to continue using Method 2 or go back to Method 1 according to your convenience.
Using these troubleshooting methods, you will now be able to send emails from TallyPrime through your Gmail account. Click here for more information on sending invoices and reports via email with an Outlook or Yahoo account.